1.1 Check Your Browser
The first step is to ensure that your browser is appropriately configured to support "Innovative Inspection Forms" as a web-based application. When running the browser check, you should see something similar to the figure below. If not you will have to follow the steps to enable the technology that is not enabld. See "why do I need to enable Javascript, cookies and popups" if you are unsure why you need to do this in order for the application to work.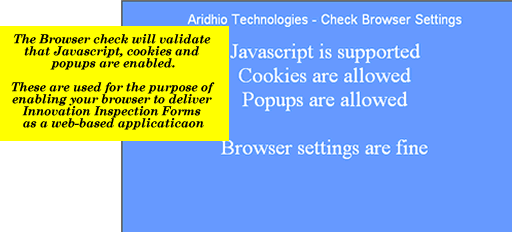
Figure 1a
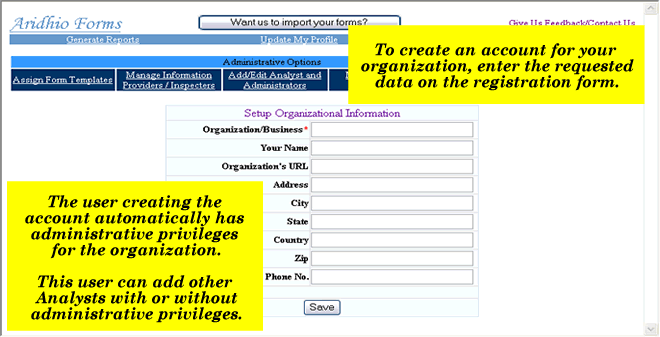
1.2 Signup to Start Viewing and Designing Forms
Your email address will be used to login. Confirm email address and select a password to signup.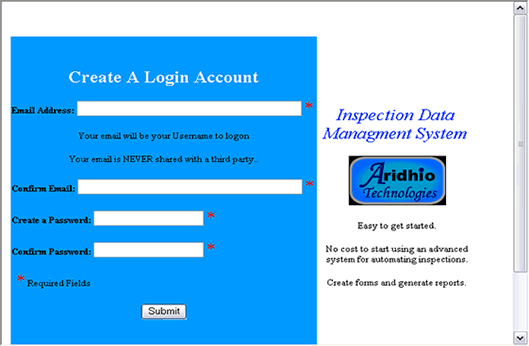
Figure 1b
Upon successfully signing up, you will be taken to a page where you can login a Forms Design Application or a Report Generation application. A this point we will start with Forms Design
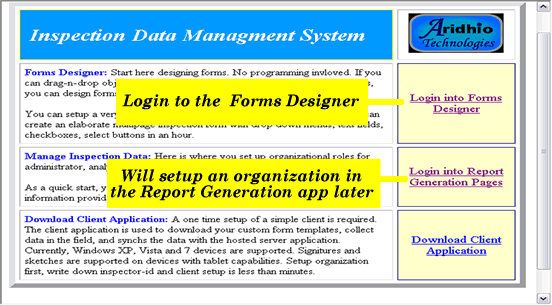
Figure 1c
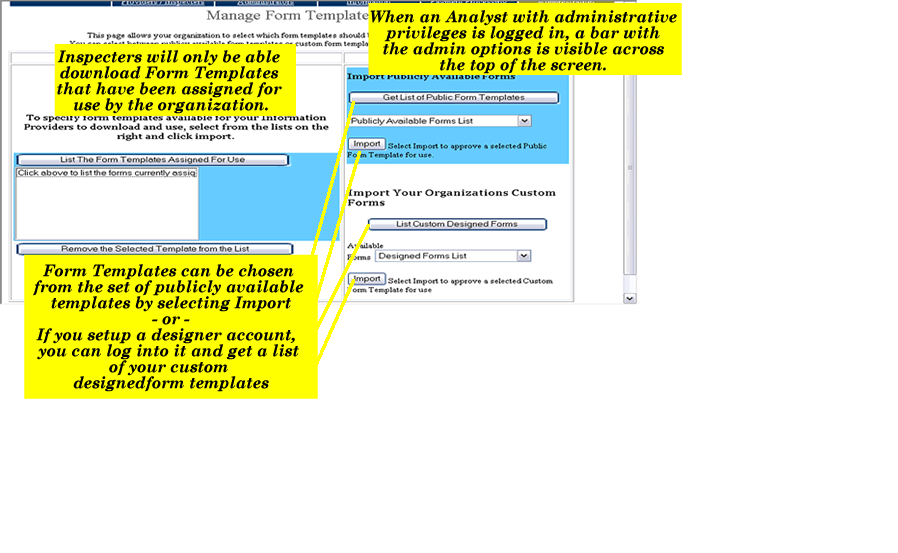
1.3 Forms Designer Account
Your browser should now be appropriately configured. If you have not already done so, you may want to kick the tires for a few minutes to get the hang of creating textfields, drop down lists, etc, and moving these items around on the design canvas. None of you what you create or modify will be saved until you create a Forms Designer account and login, so you don't need to spend too much time making elaborate forms at this particular point. That will come in just a few more steps.
The goal of Forms Designer is to make it easy to quickly get up and running with out having to spend weeks or months writing custom code.
With your browser configured and a few minutes of getting familiar with the design canvas, we are now ready to register in the Forms Designer part of the application. This will setup an account for you to design and save your forms. You can allow access for your colleagues to collaborate with you if you like, by making them members of one or more groups that you will create.
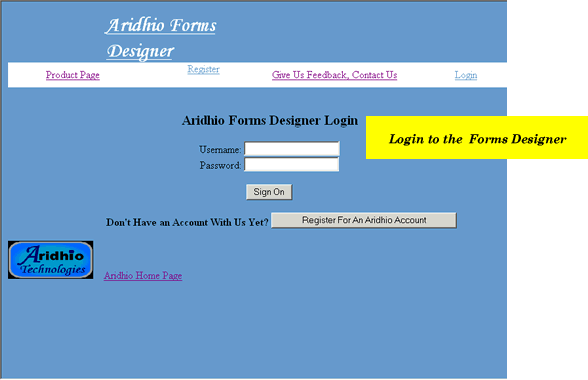
Figure 1d
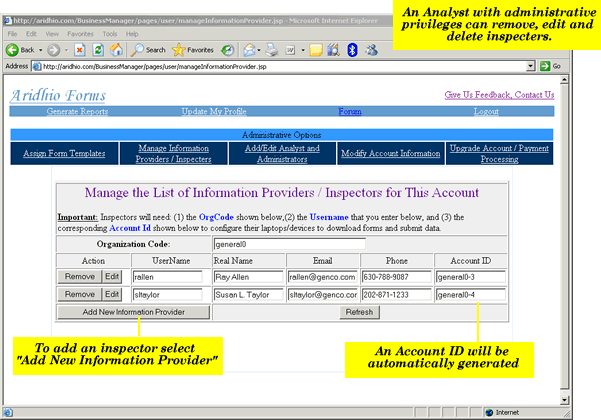
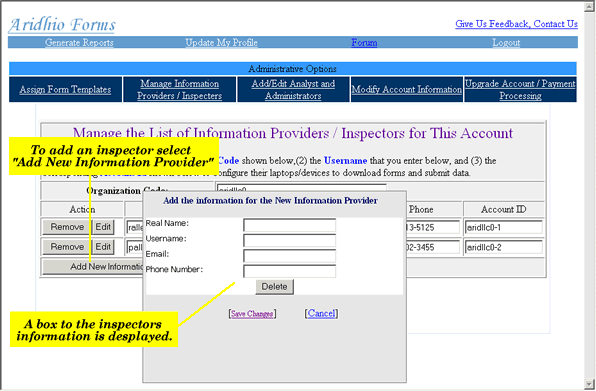
1.4 Setting Up a Forms Designer Group
Next step is to setup a group. You can setup as many groups as you like. When you design a form, you will associate that form with the group that select to work in. You can invite colleagues to work in a particular group. So as an example, you could create an "official" group for creating forms that should be used today and an "experimental" group for projects that you are working on, on the side. Then for example, you invite your work colleagues to collaborate with you in the "official" group and a university researcher collaborates with you in the "experimental" group. When you allow someone else into a group, as the group's creator, you can grant them read-only or read-write permissions.
A group name has to be universally unique so it is recommended that you use something like:
MyOrganization SomeGroup
or
MyOrganization MyDivision SomeGroup
for your GroupName
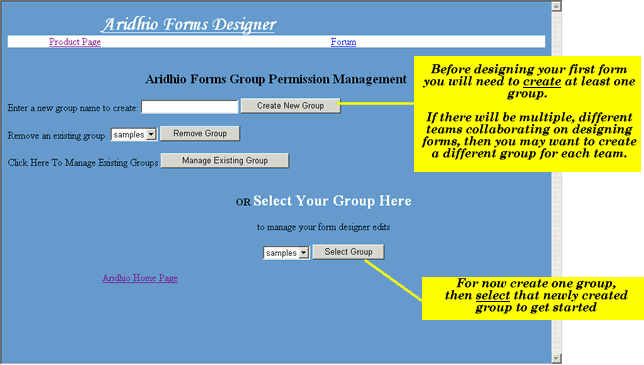
Figure 1e
1.5 Subsequent Logins to Forms Designer
Once you have one or more groups created, just find the group that you want to work with from the dropdown list then click on "Select Group Choice"
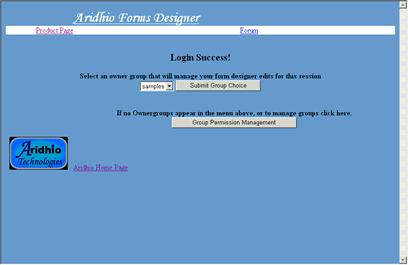
Figure 1f
1.6 Designing Forms
We are ready to start designing our first form. Select CREATE OR MODIFY FORM, Figure 1e.
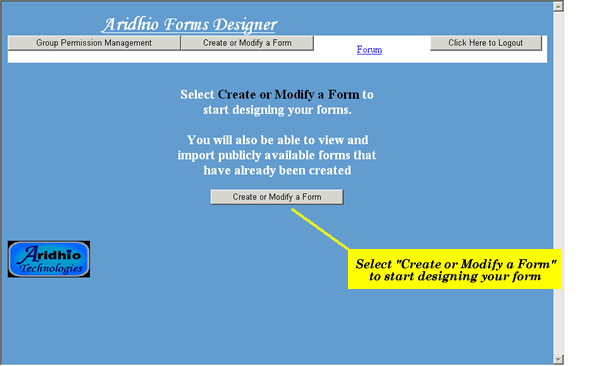
Figure 1g
1.6.1 Starting a New Form
You will start with an empty Design Canvas. From here you could load a design that you or a colleague had previously started or one from the publicly available list.
Here we will be start a new form, which do clicking on the "Start a New Form" image on the left-hand side of the screen.
![]()
Figure 1h
1.6.2 Selecting Controls
From the palette on the left-hand side of the screen, you can select between drop down lists, textfields, labels, radio group boxes and checkboxes.
When a dropdown list or a textfield is selected, a label is automatically created as well.
A popup window is displayed when a dropdown list or a radiobutton group box is selected. A variable number of options can be entered into the popup window.
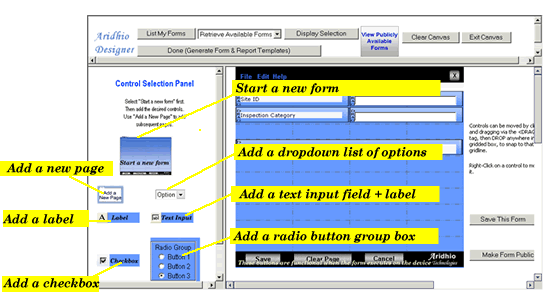
Figure 1i
1.6.3 Editing Controls
Once a control has been created, it can be edited by right-clicking on its border and making the desired changes in an edit box that comes up.
By default, two columns are created and each created control (drop down list, checkbox, etc), will cover half of a row on the canvas. Any control can be modified to fit in 1/4th the width of a row, 1/2 the width of a row, 3/4th the width of a row or a full row (editing is covered in the next section).
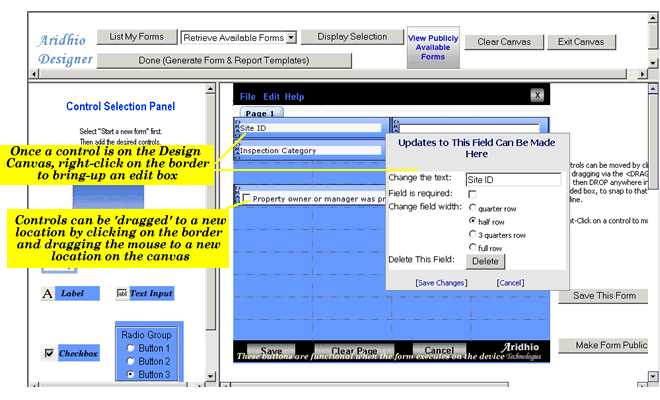
Figure 1j
1.6.4 Adding Radio Groupboxes Controls
Radio group boxes works fine for selecting one of a few choices where each option is visible. For this control, you will be presented with a popup window to enter in the desired values.
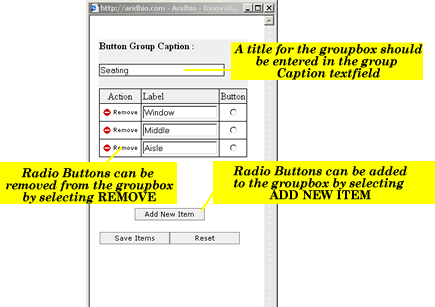
Figure 1k
1.6.5 Adding Dropdown List Controls
Dropdown list controls are a good way to conserve screen real estate especially when many options are provided. For this control, you will be presented with a popup window to enter in the desired values.
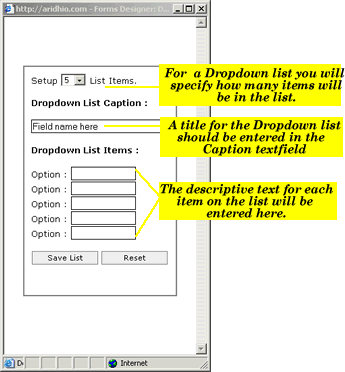
Figure 1l
1.6.6 Finishing Your Design
Once you finish a design session, be sure and select "Save Form". You can load the form and continue to work on it at a later time.
Once you are completely done designing your form, you will need to select "Done (Generate Form and Report Templates)". Depending on the settings for your browser size, you may have scroll down on the frame in the window or readjust the size of the windw/frames in order to see the button.
This is were a quite bit happens to make an end-to-end system possible. This step will generate a software version of the form that can be downloaded to a laptop or Tablet PC, allowing inspectors to work even if they are disconnected. This also generates the reporting template that analyst will use when viewing the results of submitted form instances.
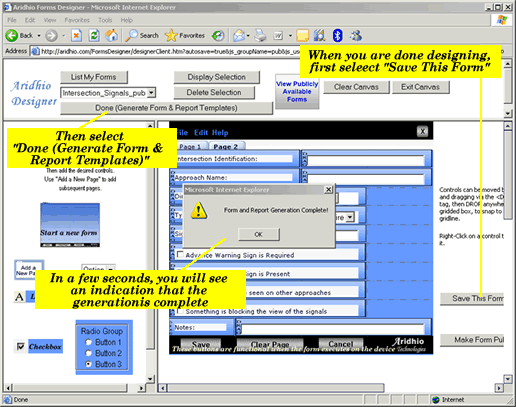
Figure 1m